Google Play Storeの接続方法
ブランドは、Play Storeのレビューをリアルタイムで監視し、対応できるようになります。同じエンゲージ受信箱内で、App Store、Facebook、Google Business、Instagramのような様々な他のチャネルからのレビューや会話を管理します。
エンゲージ内の各Play Storeのレビューごとに、チームはより良いコンテクストに向けて、星評価、アプリのバージョン、デバイスの種類を取得できます。
まずは、StatusbrewにPlay Store Appを接続しましょう。
StatusbrewとGoogle Play Storeのインテグレーションは、Enterpriseプラン限定です。
以下は、StatusbrewにGoogle Developer Consoleを接続するためのステップバイステップのガイドです。
前提条件
Google Play Storeアプリをアクティブにします。また、Google Cloudに戻り、"Google Play Android Developer API"のサービスを有効にする必要があります。

Google Developer Consoleのステップを完了させる
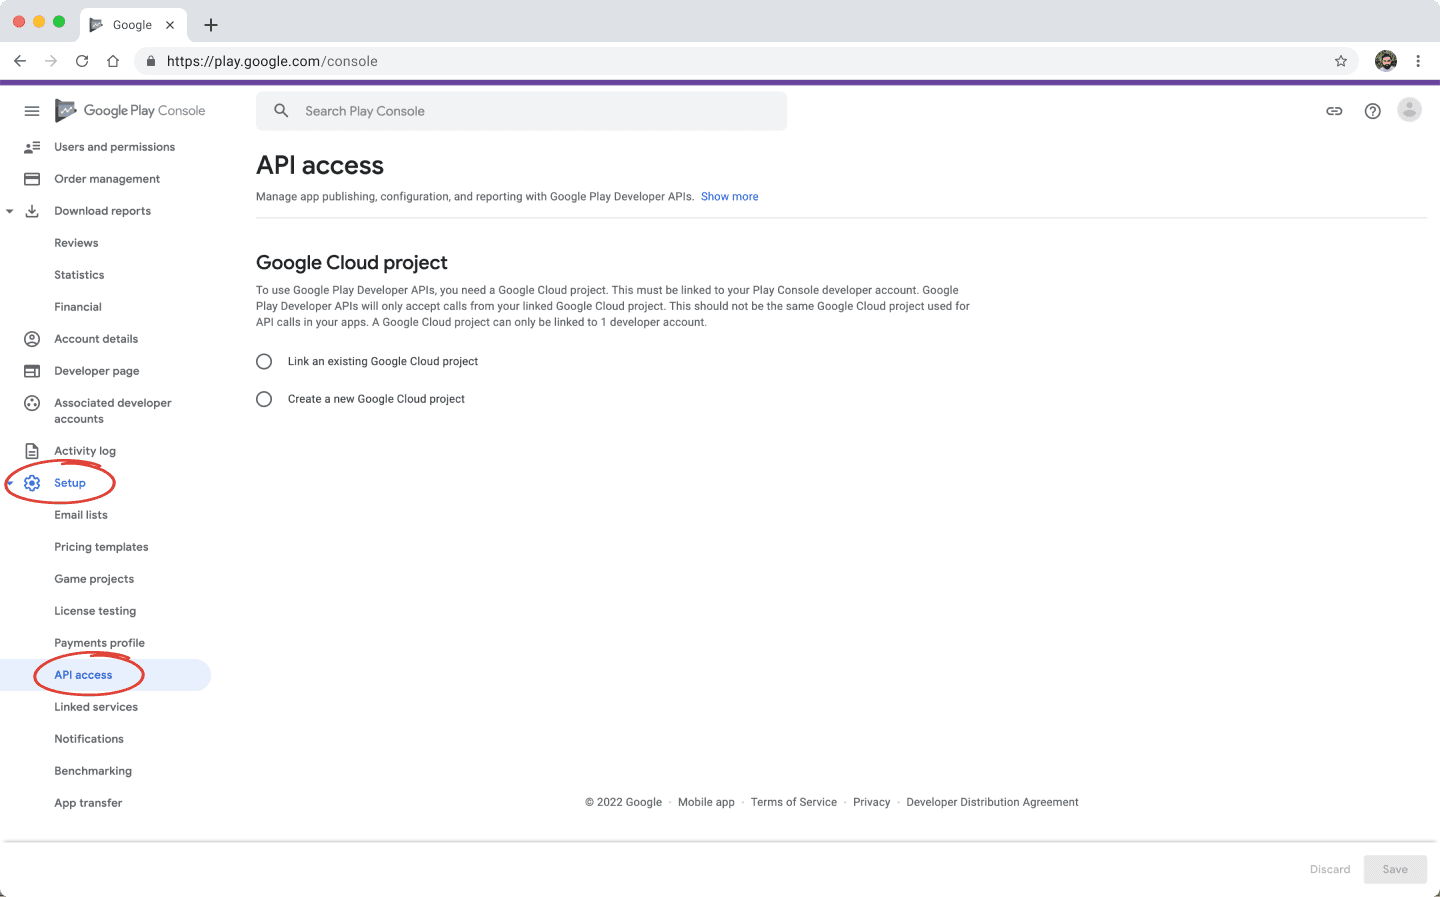
Step 1 - Developer Consoleにログインし、設定をクリック > 左側のパネルからAPIアクセス
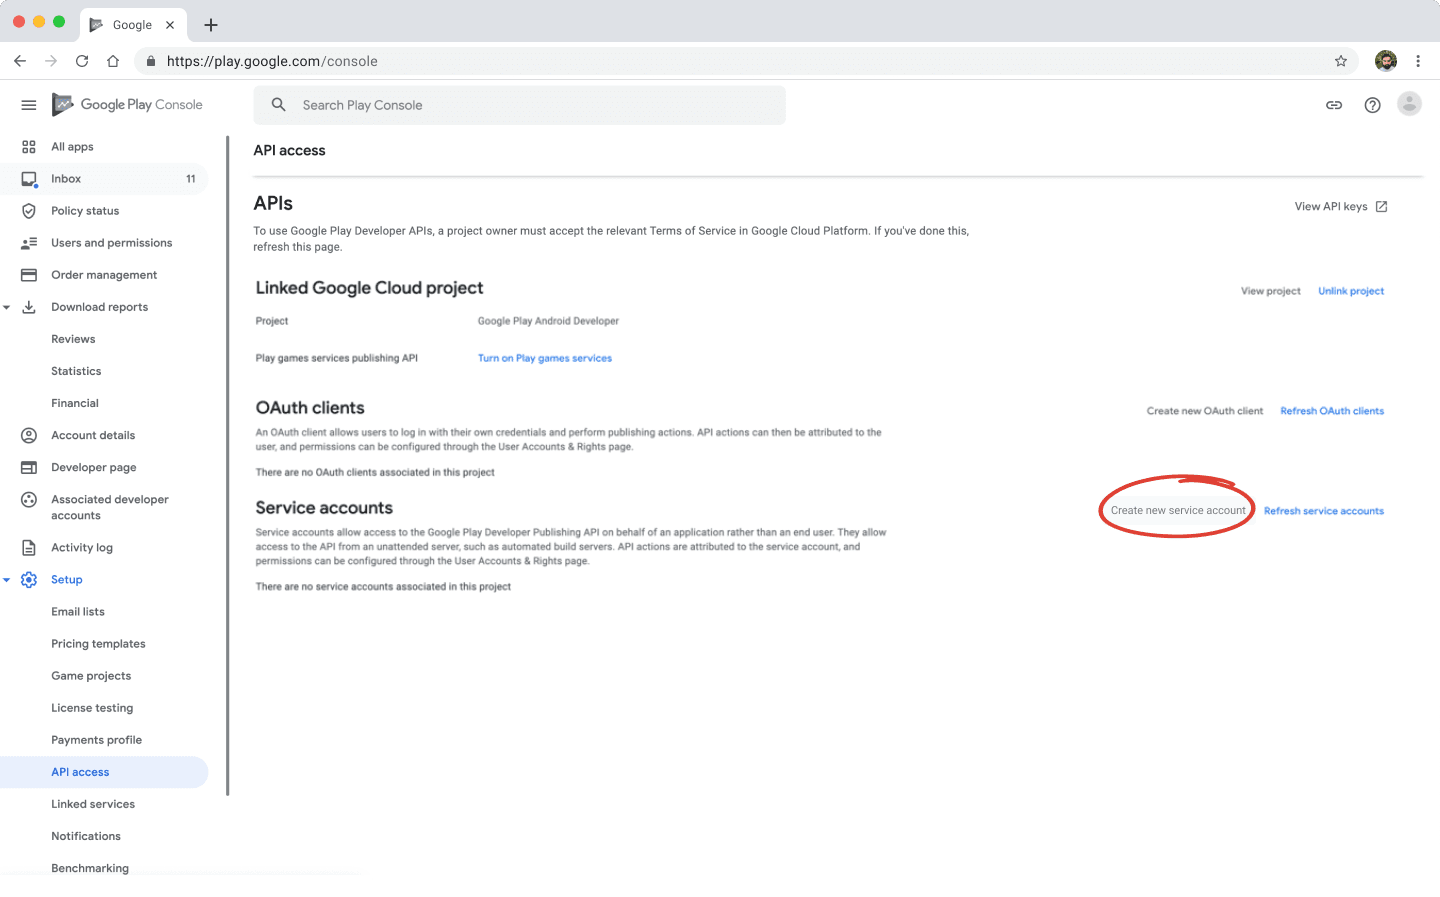
Step 2 - サービスアカウントを作成する方法を見るをクリックします
Step 3 - 以下のような、やることリストのダイアログボックスが表示されます。早速、完了させていきましょう!
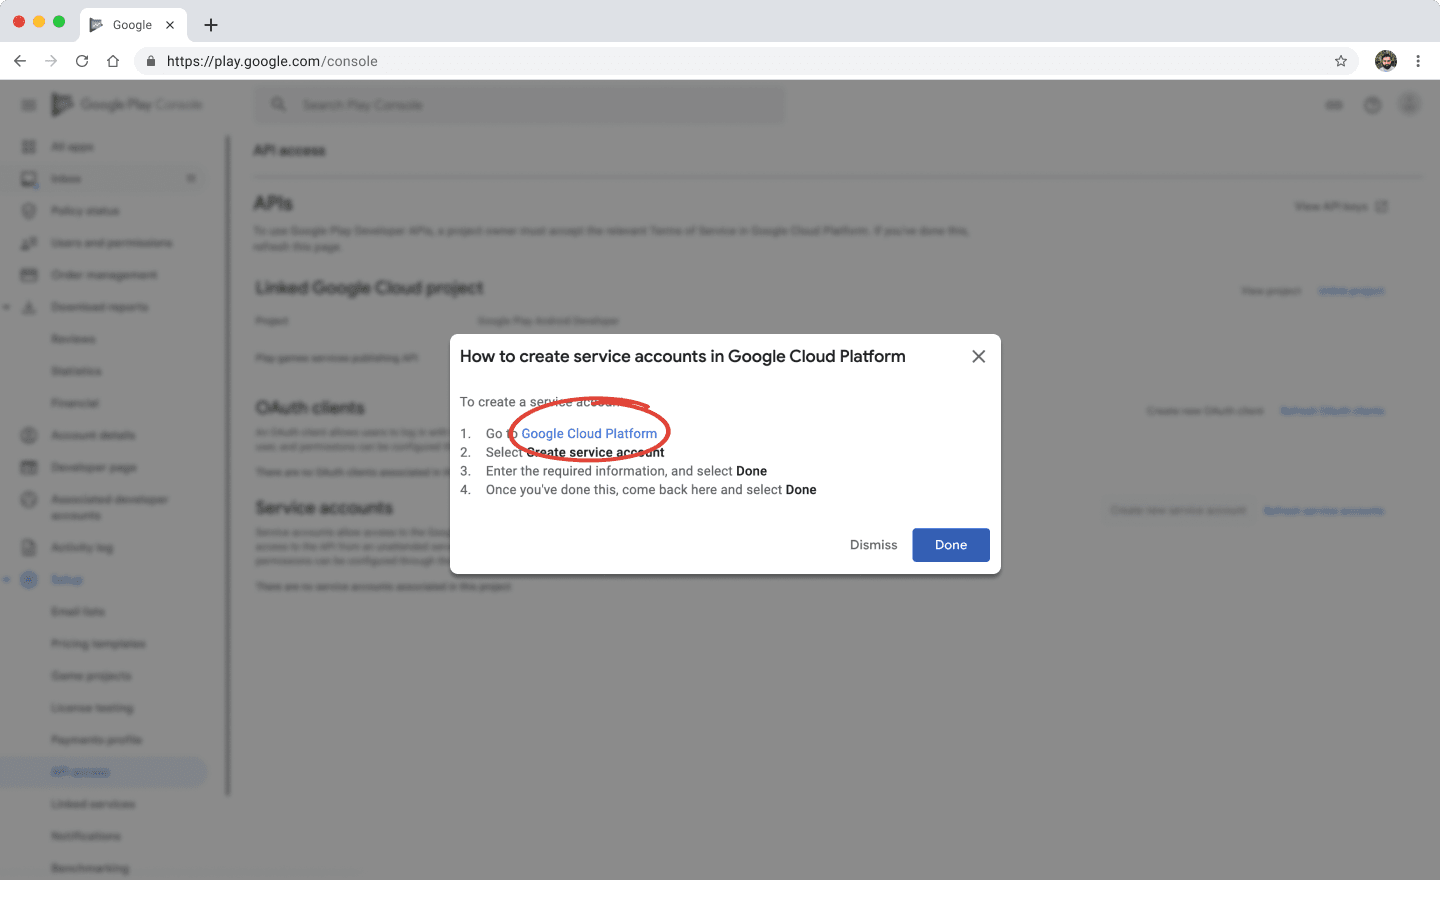
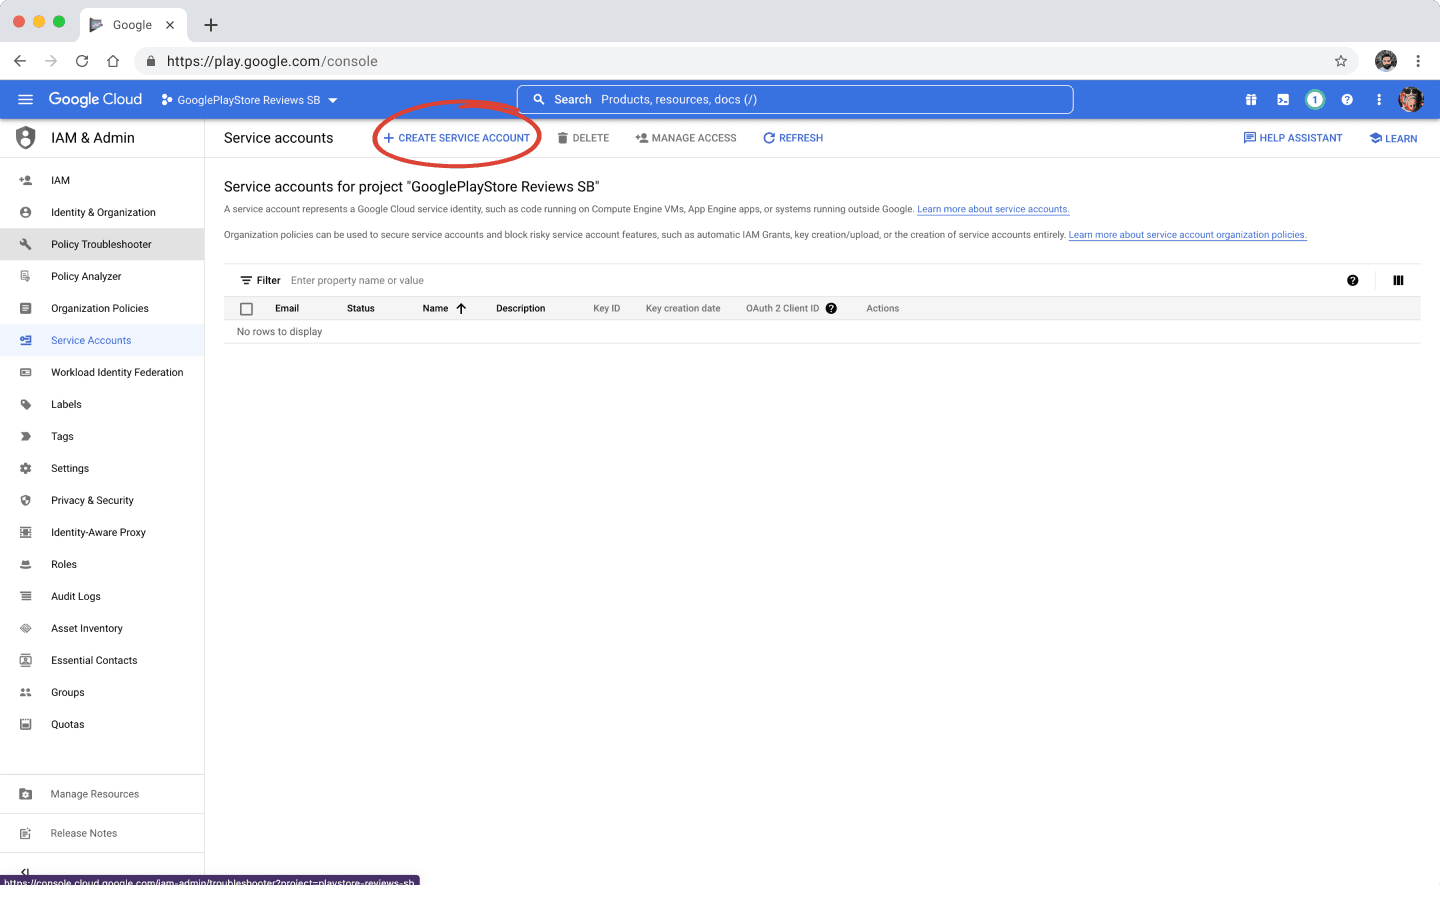
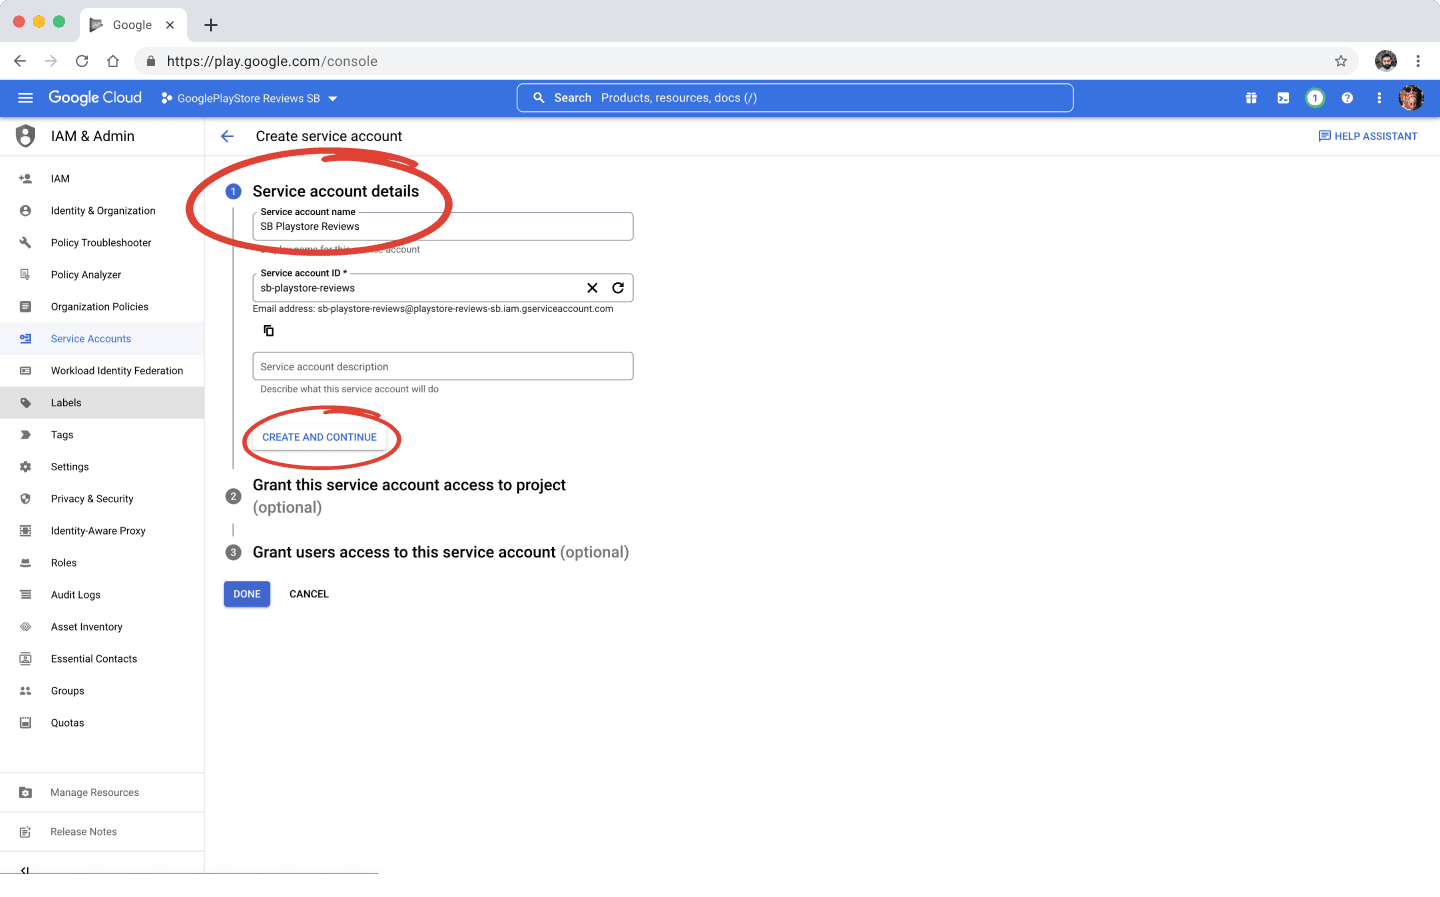
Step 3.1 - Google Cloud Platformを開き、+サービスアカウントを作るをクリックします。
Step 3.2 - サービスアカウントを作成して、以下のことを設定します。
ご注意:サービスアカウントIDは、+サービスアカウントを作るをクリックすると、自動的に作成されます。 サービスアカウント名(SB+Playstoreのような、わかりやすい名前がオススメです)を設定します。
そして、ロールのドロップダウンメニューをクリックし、Basic > オーナーを選択します。このロールは、オプション選択時にご説明したように、統合への全権限を持ちます。
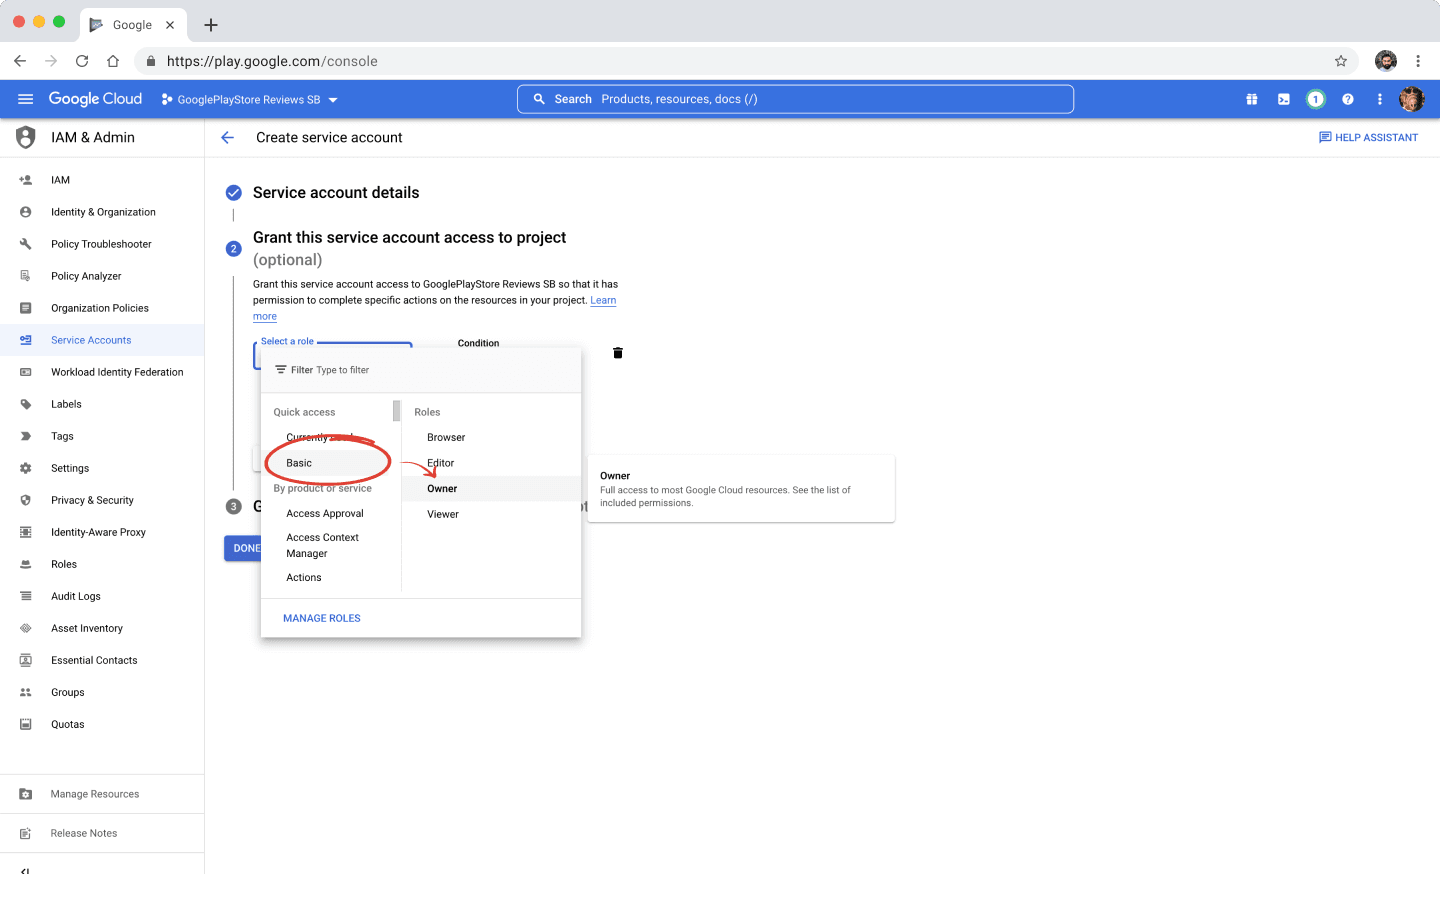
ロールを選択したら、完了をクリックします。最終的な構成は以下のようになります。
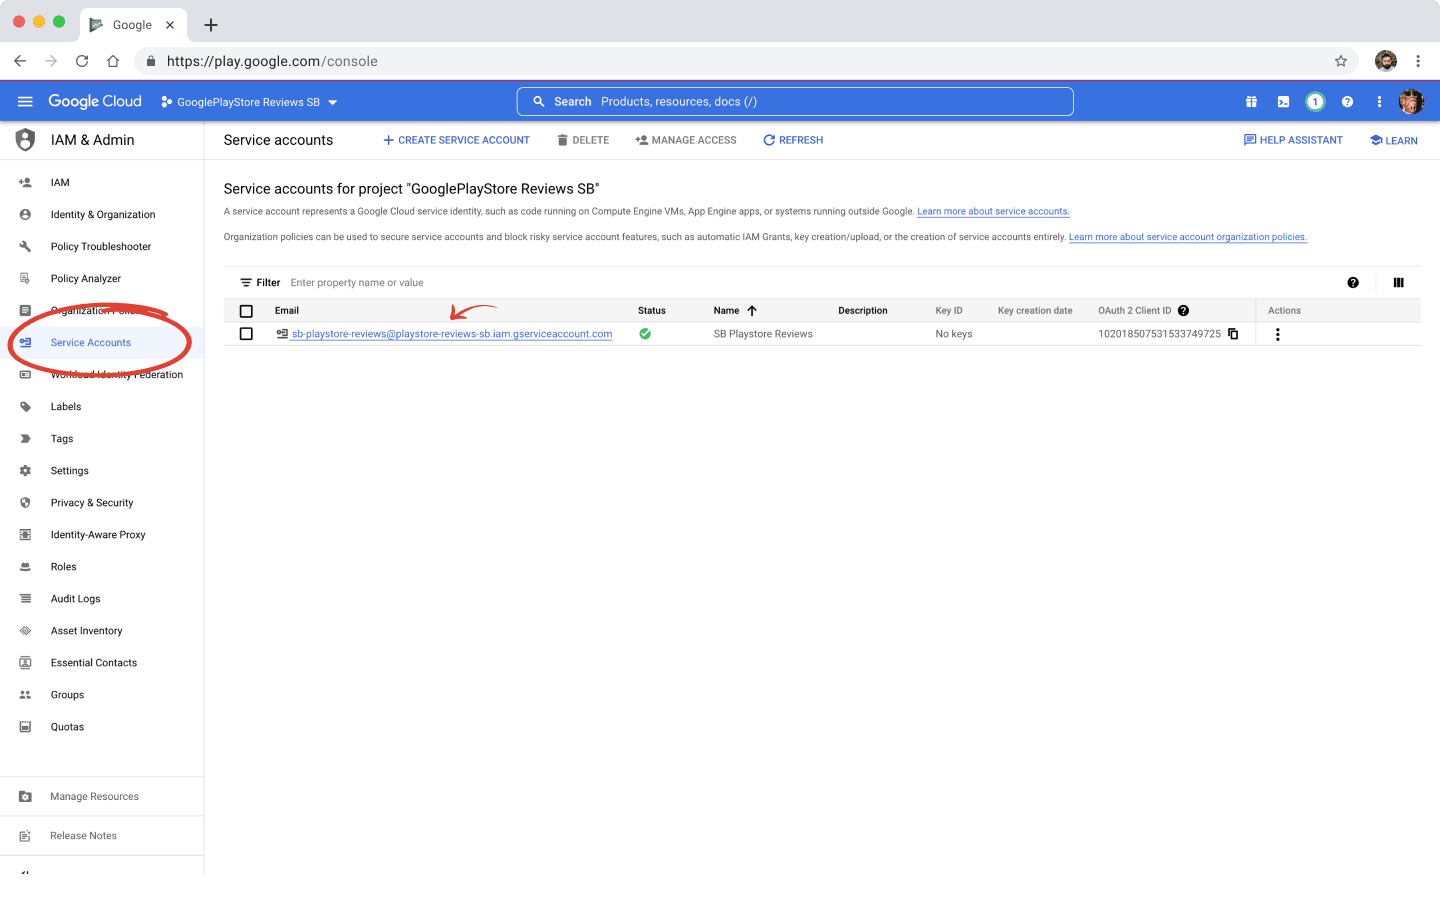
次に、作成したサービスアカウントをクリックし、キーをクリックし、鍵を追加のドロップダウンから、新しい鍵を作成をクリックします。JSONタイプを選択し、作成をクリックします。
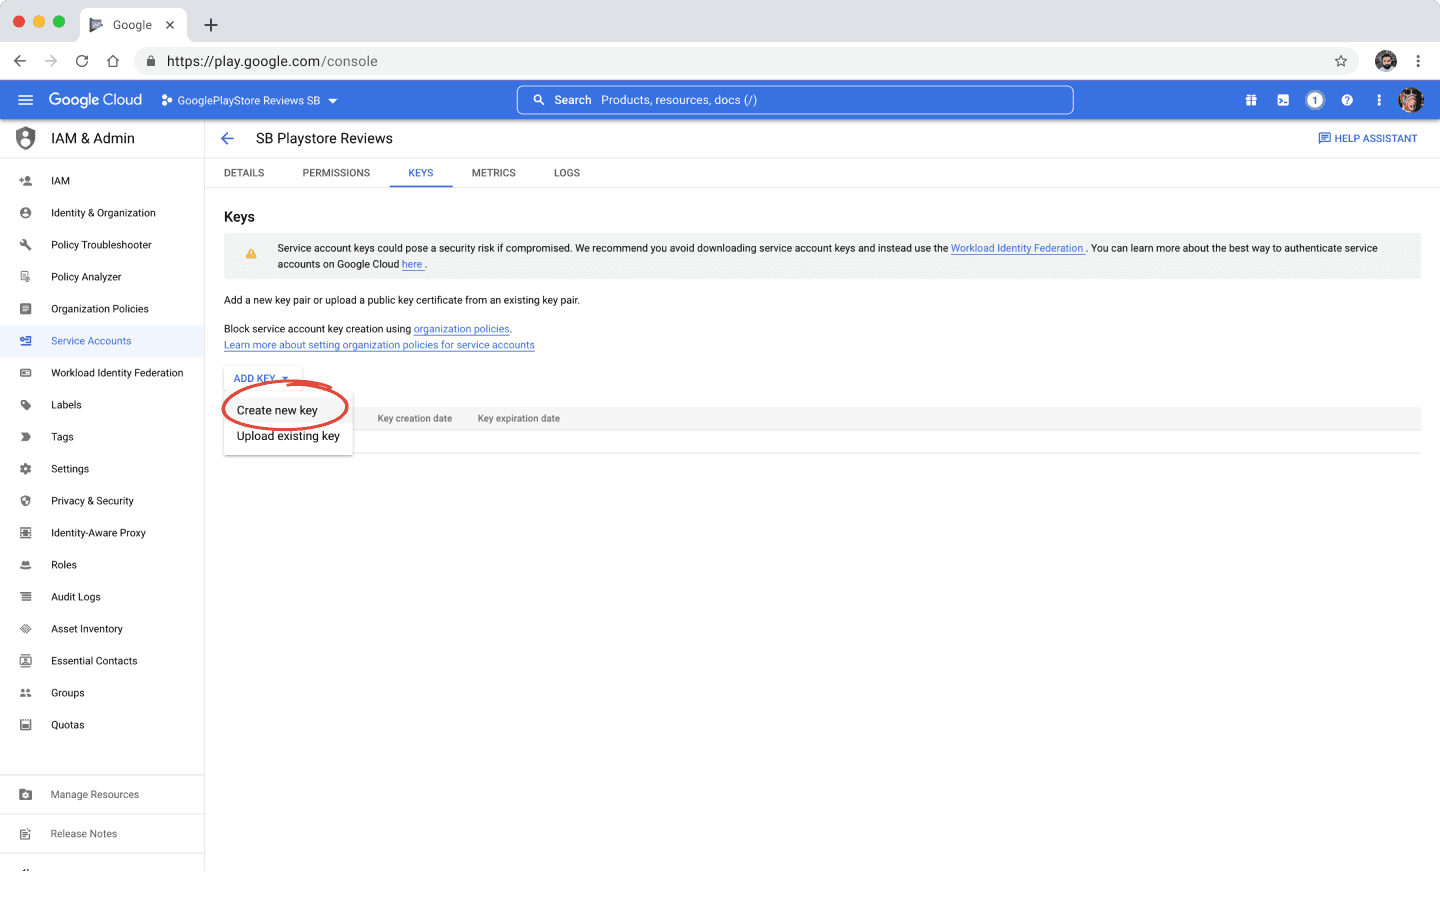
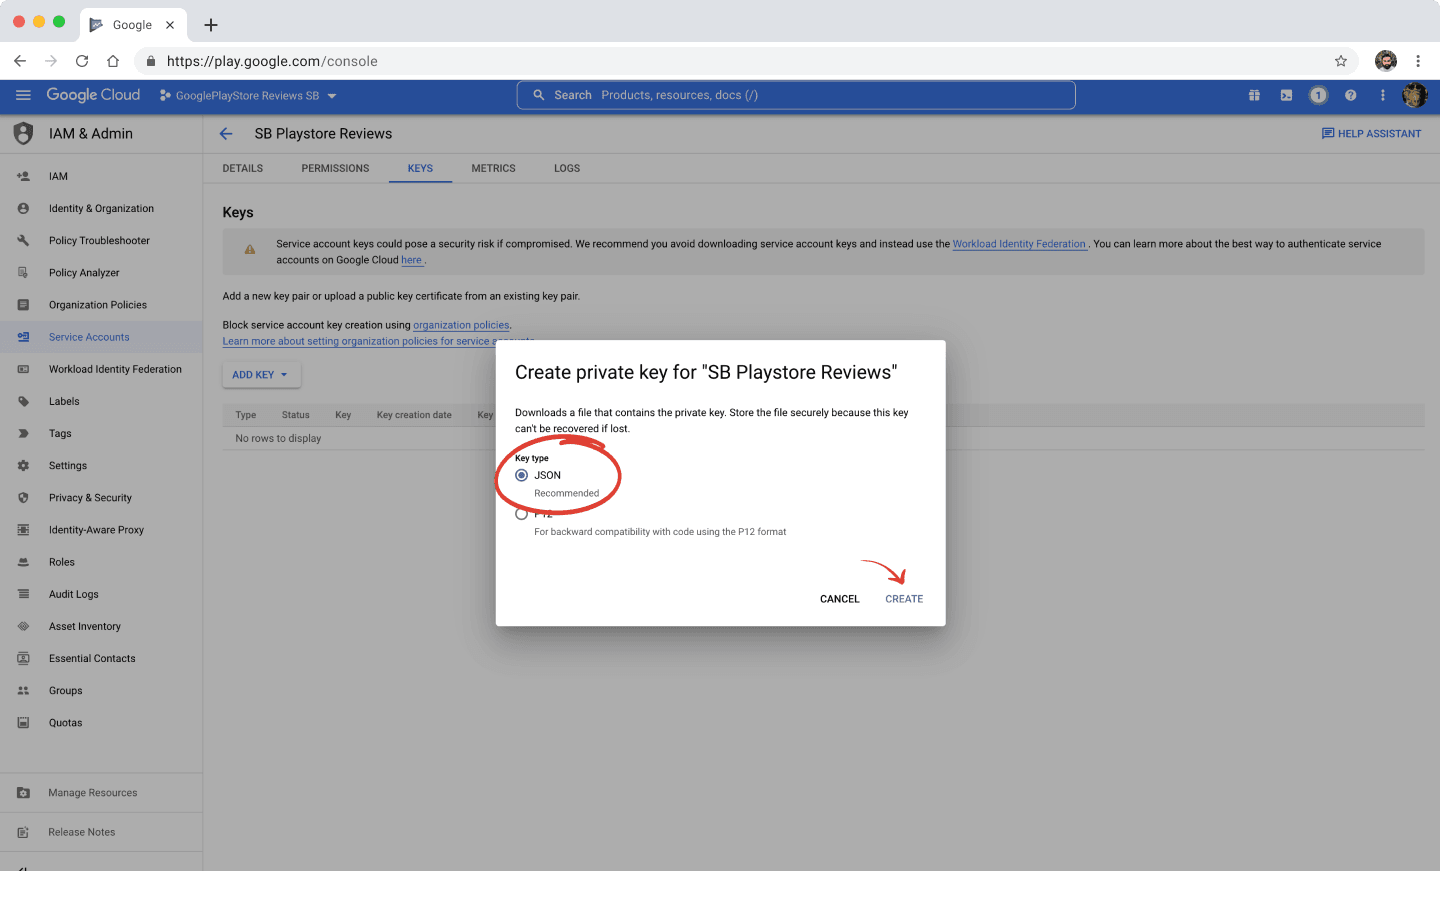
作成をクリックすると、あなたの端末にJSONファイルがダウンロードされます。このファイルを保存します。 Google API Consoleの設定はこれで完了です。
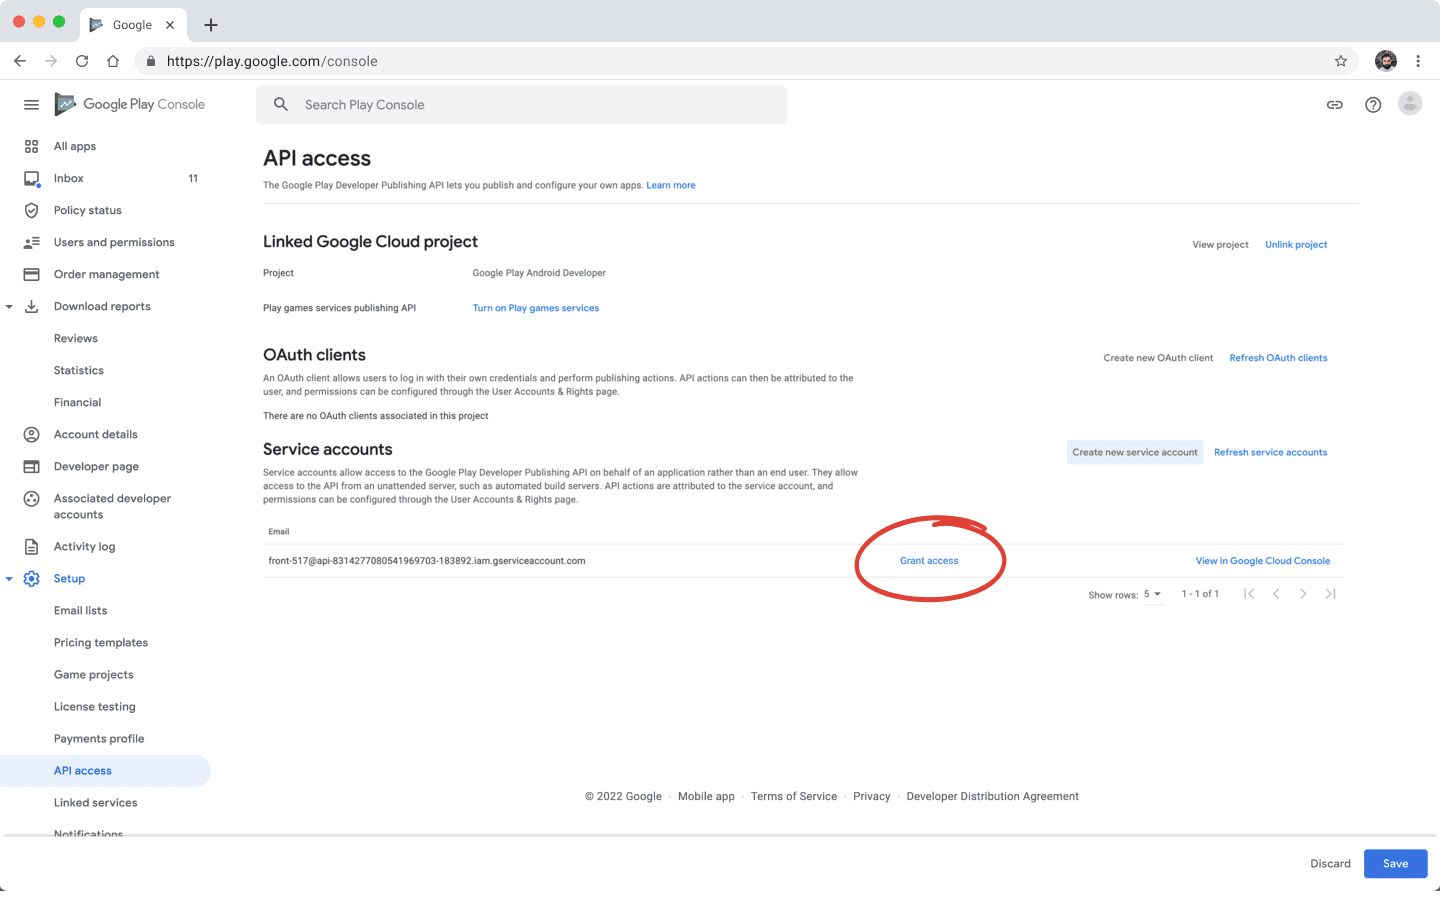
Step 4 - Developer Consoleに戻り、完了をクリックします。最新のサービスアカウントが表示されます。新しいサービスアカウントのアクセスを許可をクリックします。
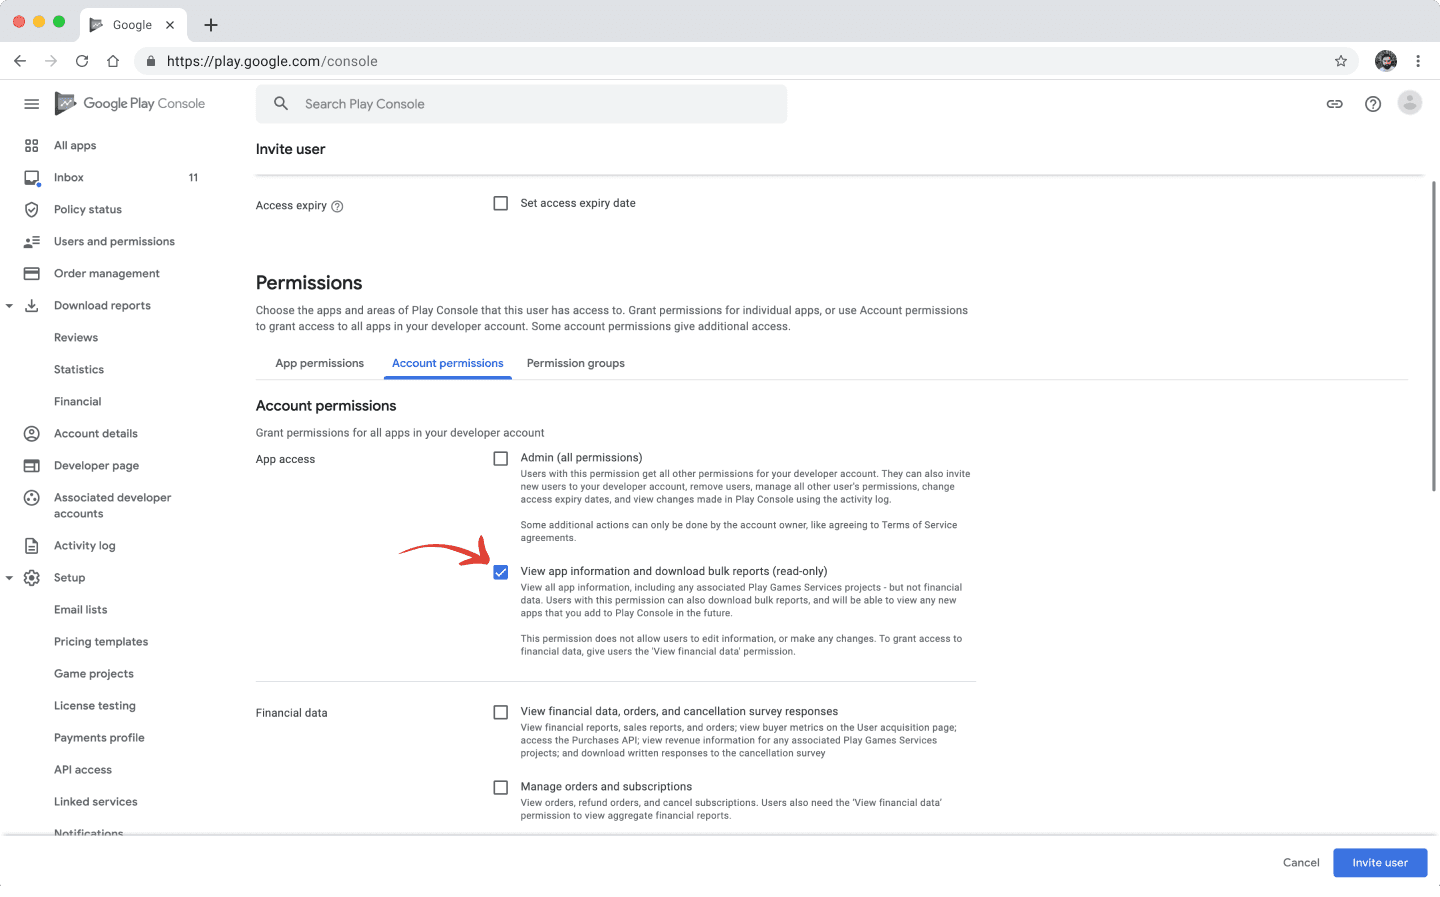
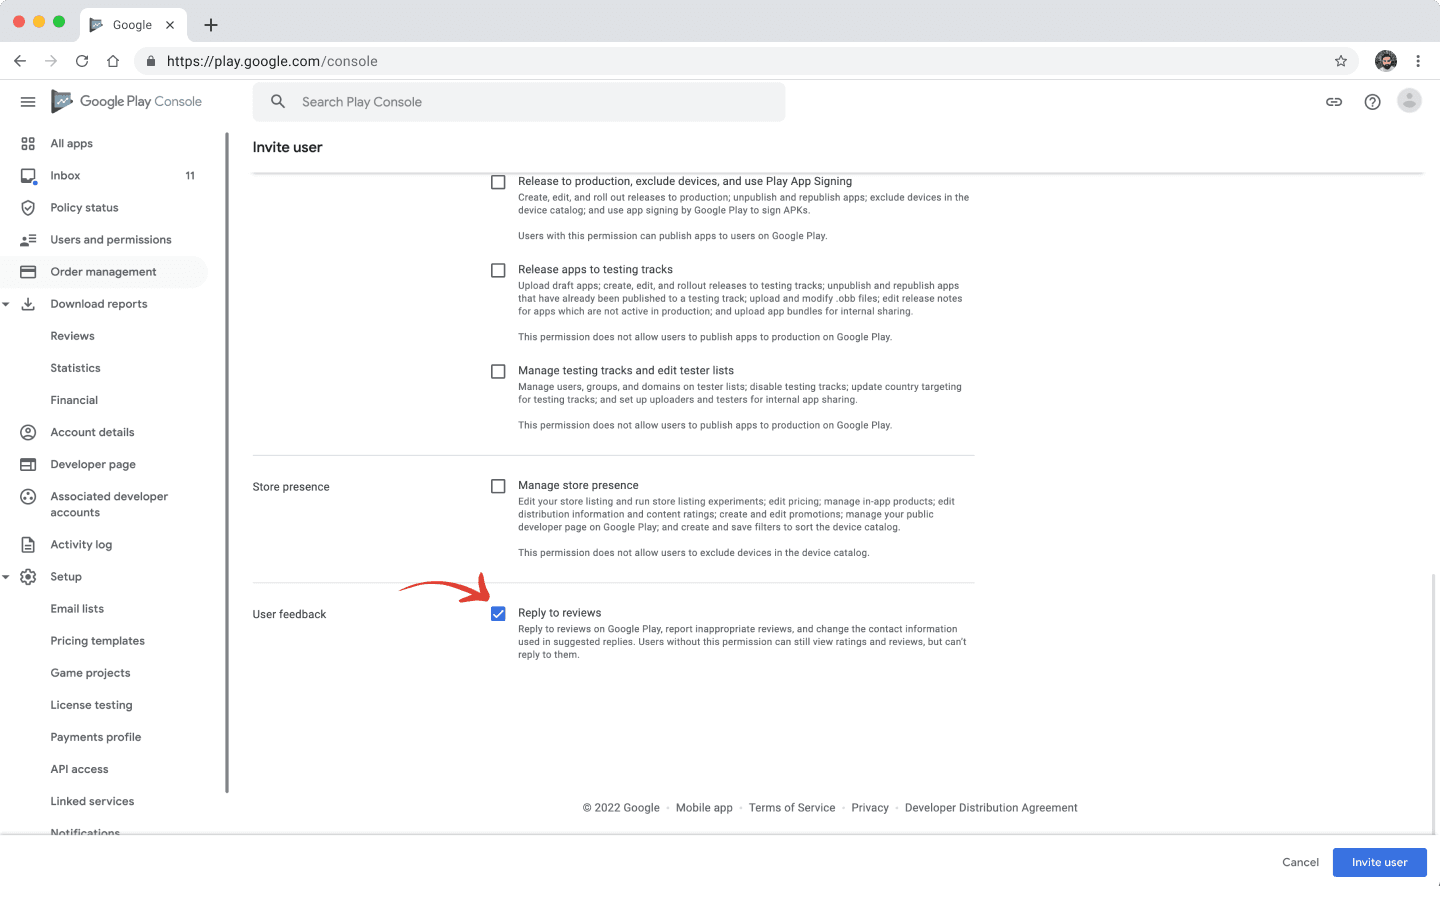
Step 5 - 新しく作成したサービスアカウントが正しい権限を持っているか、確認しましょう。アプリ情報の表示とレビューへの返信以外の権限は全てチェックを外す必要があります。
Step 6 - ユーザーを招待するをクリックして、完了です! 新たに作成されたユーザーは、設定 > ユーザーアカウントと権限に表示されます。 これにて完了です、お疲れ様です。では、Statudbrewに戻りましょう!
Statusbrewのステップを完了する
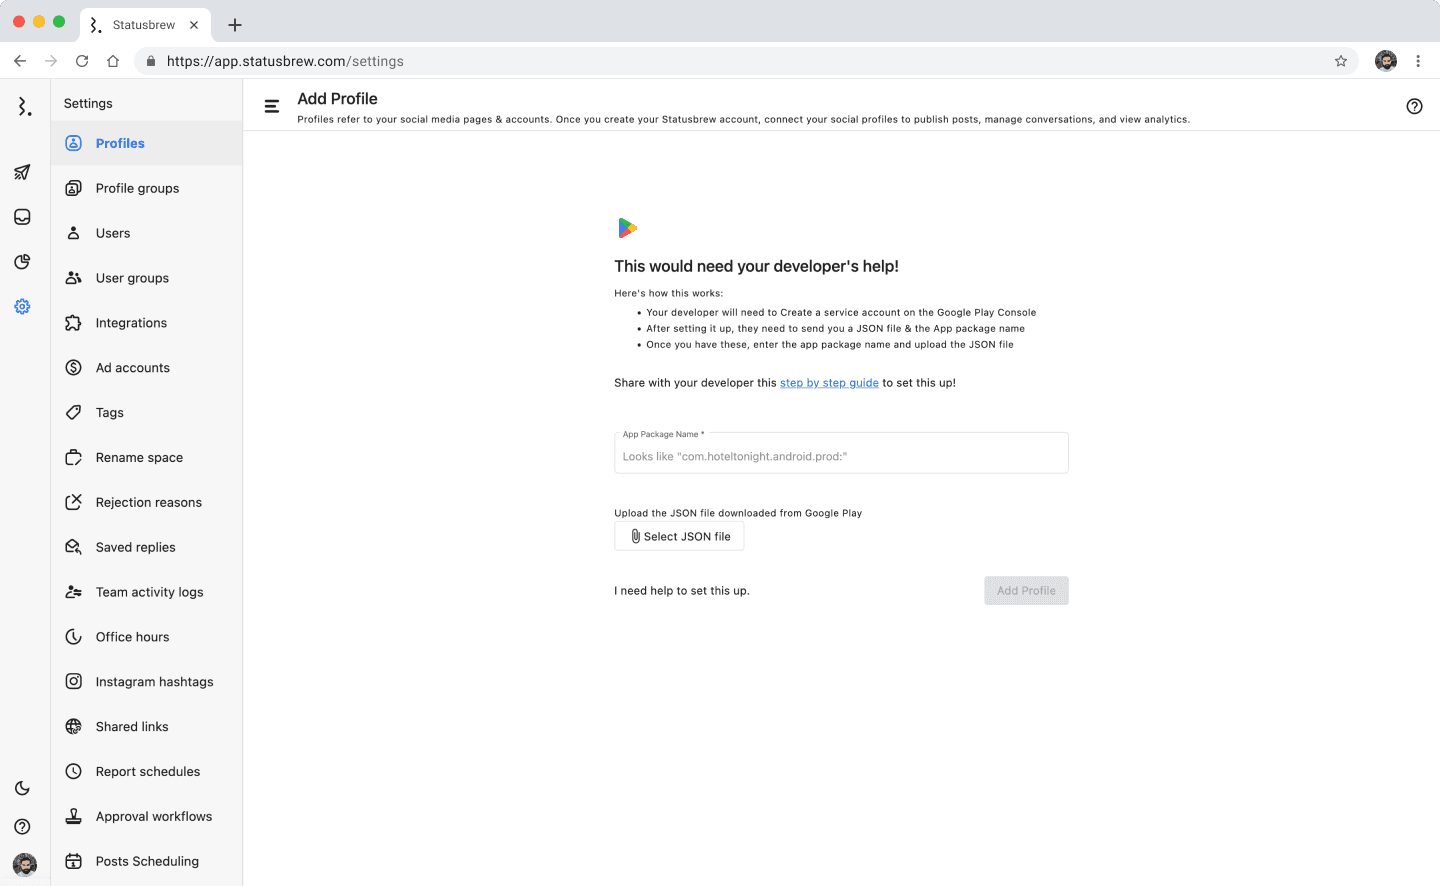
Step 1 - Statusbrewのダッシュボードから、設定をクリックします。設定のメニューから、プロファイル > プロファイルを追加をクリックします。
Step 2 - プロファイルメニューの中から、Play Storeのアイコンをクリックします。
Step 3 - 次の画面で、アプリのパッケージ名を入力し、JSONファイルをアップロードして、プロファイルを追加をクリックします。
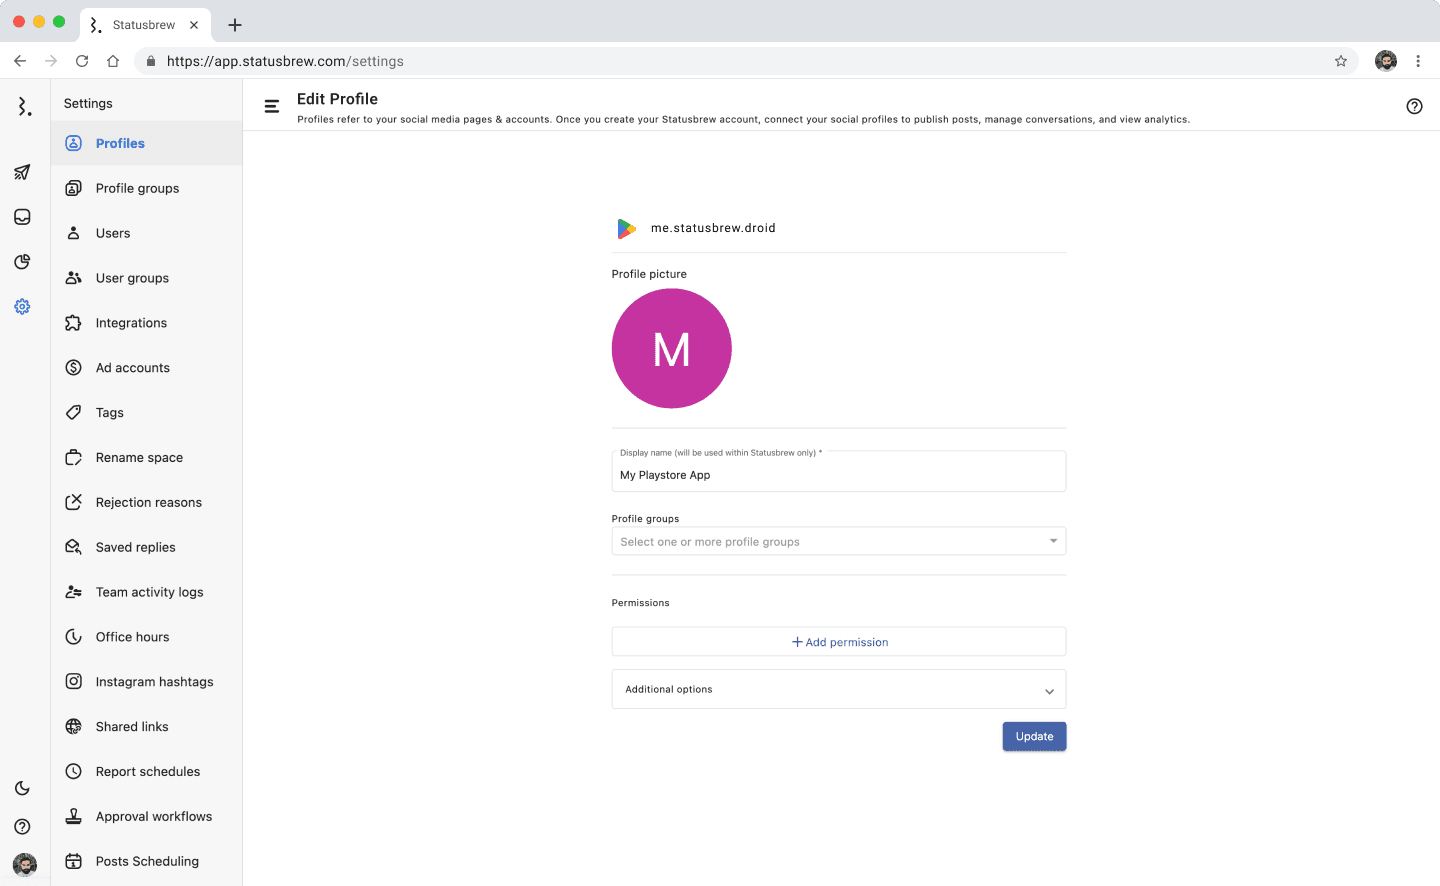
Step 4 - 新たに追加したPlay Storeへのメンバーのアクセス権を設定し、更新をクリックします。
Statusbrewでは7日以内にGoogle Play Storeで投稿されたレビューを自動的に同期します。